(1)")

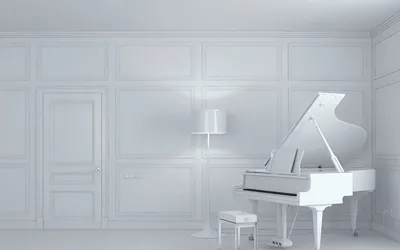
Are you tired of staring up at your outdated, popcorn-textured ceiling? Perhaps you’ve finally decided it’s time for a change—a fresh coat of paint, a smoother surface, a modern aesthetic. Before you embark on this transformative journey, let’s explore the delicate process of removing and painting popcorn ceilings, along with the pitfalls to avoid and why entrusting this task to a professional is paramount.
The Popcorn Predicament
Popcorn ceilings, once popular for their acoustic properties and ability to hide imperfections, have fallen out of favor in recent years due to their dated appearance and the potential health hazards associated with asbestos in older installations. Removing this texture is the first step towards reviving your space, but it’s not without its challenges.
What to Avoid
DIY Dilemmas:
While the allure of a DIY project may be strong, popcorn ceiling removal is not for the faint of heart. Without proper precautions, you risk damaging your ceiling, releasing harmful substances, and creating a mess that’s difficult to clean up.
Skipping Safety Measures:
If your home was built before 1978, there’s a chance that the popcorn texture contains asbestos. Disturbing asbestos without proper protection can lead to serious health risks. Always have a professional test for asbestos before attempting removal.
Underestimating the Scope:
Removing popcorn texture is a labor-intensive process that requires patience and precision. Underestimating the time and effort involved can result in frustration and subpar results.
The Process: How to Do It Right
Preparation is Key:
Start by preparing the room—remove furniture, cover floors and walls with plastic sheeting, and ensure adequate ventilation. Turn off the HVAC system to prevent spreading dust throughout your home.
Test for Asbestos:
If your home was built before 1978, have a professional test for asbestos. If asbestos is present, hire a licensed abatement contractor to safely remove it.
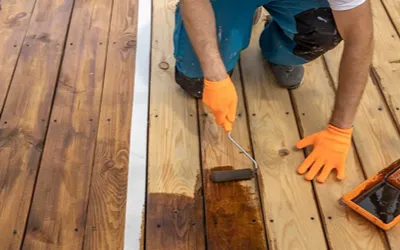
Wet and Scrape:
For non-asbestos popcorn ceilings, wet the texture with a spray bottle filled with water and a few drops of dish soap. Allow it to soak for 10-15 minutes, then gently scrape away the texture with a putty knife or ceiling texture scraper.
Repair and Smooth:
Once the texture is removed, inspect the ceiling for any imperfections or damage. Repair any cracks or holes with joint compound, sand the surface smooth, and prime with a high-quality primer to ensure proper adhesion of the paint.
Paint with Precision:
Choose a high-quality ceiling paint and apply it evenly using a roller with a thick nap. Work in small sections, overlapping each stroke for a seamless finish. Two coats may be necessary for full coverage.
Why Hire a Professional
Expertise and Experience:
Professional painters have the expertise and experience to tackle popcorn ceiling removal and painting with precision. They understand the nuances of the process and can achieve flawless results efficiently.
Safety and Compliance:
Licensed professionals adhere to safety protocols and regulations, particularly when dealing with asbestos-containing materials. They have the necessary training and equipment to protect themselves and your home from potential hazards.
Time and Convenience:
While DIY projects can be rewarding, they often require a significant time investment. Hiring a professional allows you to sit back and relax while your ceiling is transformed, saving you time and hassle.
Conclusion
Removing and painting popcorn ceilings is a transformative process that can breathe new life into your home. By understanding the complexities involved, avoiding common pitfalls, and entrusting the task to a professional, you can achieve flawless results that elevate your space and leave you with a ceiling worth admiring. Don’t let the popcorn predicament hold you back—embrace the journey towards a smoother, more modern aesthetic.